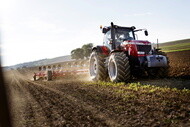
picture-axiobib2-0221-at-work-8.full.jpg
TRacteur équipé de pneus MICHELIN AXIOBIB2 dans un champ
Fitting and removing your tyres
Fitting and removal operations can involve risks so Michelin recommends that Agricultural tyres are fitted and removed by trained and qualified professionals using the appropriate tools and operating methods. Never entrust these operations to an apprentice working alone; if these operations are carried out by more than one person, in the case of fitting large volume tyres, ensure that at least one other person is present throughout the operation. Use a compressed air supply equipped with a correctly adjusted pressure regulator. Not following these instructions and methods might result in the agricultural tyre being fitted incorrectly on the rim and cause rapid tyre deflations with the associated risk of serious physical injury or even death.
Removing a tyre from the rim
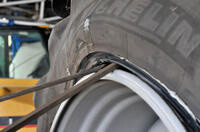
Edito removebead ag Help and Advice
disassemble a wheel
1. Never try to remove the beads of an inflated agricultural tyre from a rim.
2. ESSENTIAL: Valve core must be removed:
- Make sure the tyre is fully deflated before trying to remove it
- Do not use tools that could damage the sidewalls or beads of a tyre
- If the tyre is equipped with removal notches detach the beads from them
- To aid removal and avoid damaging the beads, particularly when repairing a puncture, lubricate the rim seats and the tyre beads
- If the rim shows obvious damage, it must be deflated before the fitted assembly is removed
Preparing for fitting
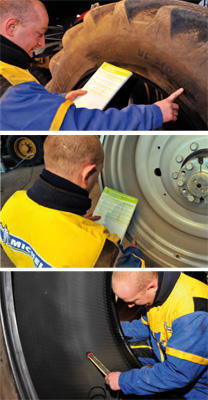
Edito remove tyre large reference Help and Advice
triptich picture of a man removing a tyre
1. Before fitting, ensure that the rim, tyre and inner tube are compatible, and check that:
- the tyre is suitable for the vehicle or machine,
- the diameter of the rim seat corresponds to the seat of the tyre to be fitted eg. 18.4 R30 tyre and DW 16 x 30 rim
- the tyre may be fitted to this rim (see characteristics in the Manufacturer’s Documentation).
⚠️ Remember - There are rims with seat diameters of 15.3’’; never fit these rims with 15’’ tyres. The same thing applies for 16.1’’ and 15.5’’ rims; never fit 16’’ tyres.
2. Before fitting a tyre that has already been used:
- the rim must be clean and in perfect condition (showing no damage),
- if not, then thoroughly clean the rim using a metal brush. Never fit a tyre to a rim that has splits, is badly misshapen, has cracks, traces of repairs by welding...
3. If the tyre has been used, carefully examine its interior and exterior for possible damage. If it shows signs of damage or deterioration that are deemed irreparable by a specialist, discard the tyre.
4. For inner tube fittings, always use a new inner tube suitable for the tyre dimensions (inner tube markings showing compatible tyre sizes).
⚠️ Do not fit the inner tube to a damaged or repaired rim, or to a rim with a finish incompatible with a tube.
Fit a new Tubeless valve whenever you replace a Tubeless tyre.
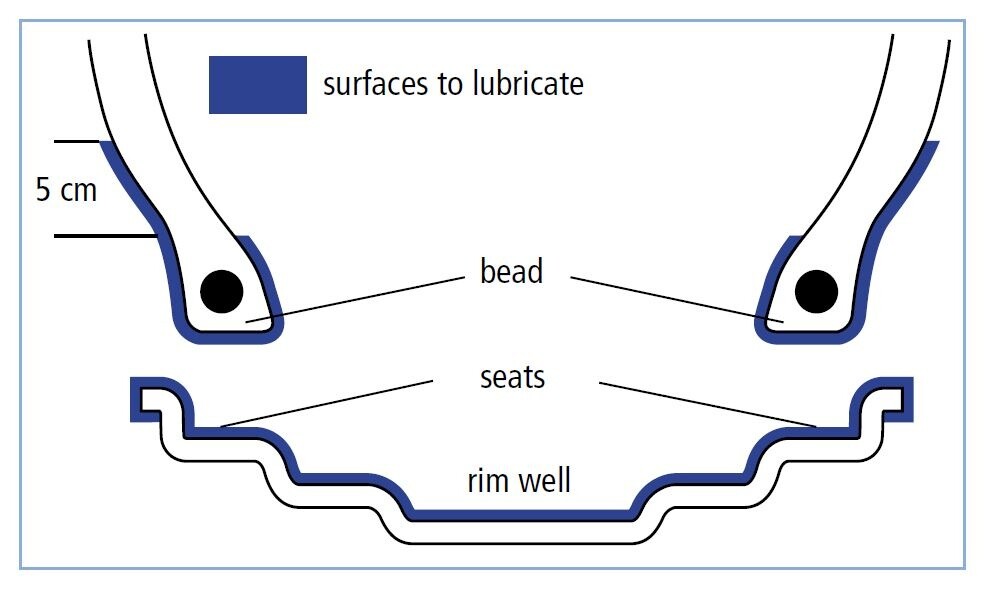
5. Always use tools that have no sharp edges, are in good condition and are suitable for the tyres and rims (bead unseating, levers, machines...). For wide or large tyres, we recommend using a bead pusher or bead unseating tool (with appropriate mechanical assistance) to fit the second bead use the bead pusher to ensure the second bead is in the base of the well of the rim to prevent tyre damage. Before fitting, lubricate the rim seats and tyre beads. Apply a thin layer of lubricant to the surfaces shown on the diagram below; on the outside of the beads the lubricant should reach 5 cm above the rim flange. Only use products designed for this purpose that will not degrade the tyre (do not for example use hydrocarbon, silicon or antifreeze-based products).
Fitting a tyre on a vertical wheel
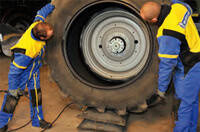
Edito fit tyre vertical Help and Advice
two men fitting a tire
fitting 7
1. Position the valve or valve hole at the bottom.
2. If there is a diagram of the valve on the sidewall of the tyre, position the diagram as close as possible to the rim valve hole or valve.
3. Slip the tyre onto the rim so that the first tyre bead is positioned against the rim flange. Remember to rotate in the direction indicated by the arrow on the tyre (if present).
4. Using a suitable lever to apply pressure approximately every 10 cm:
- push the first bead over the rim flange.
- Once the first bead is over: position the lightly inflated inner tube inside the tyre (for inner tube fittings), fix the valve by partially tightening the nut.
- For the second bead: lever it over the rim flange,
- finishing at the valve.
5. Centring the tyre, fitting the beads
- lower the jack slightly to optimise tyre centring,
- pull out the valve’s inner mechanism,
- slowly and partially inflate for optimal bead positioning,
- check the beads are not pinching the inner tube, inflate to 2.5 bar but no more, to ensure that the beads are properly positioned.
Inflation and bead positioning
Picto ag help advice schema fitting en Help and Advice
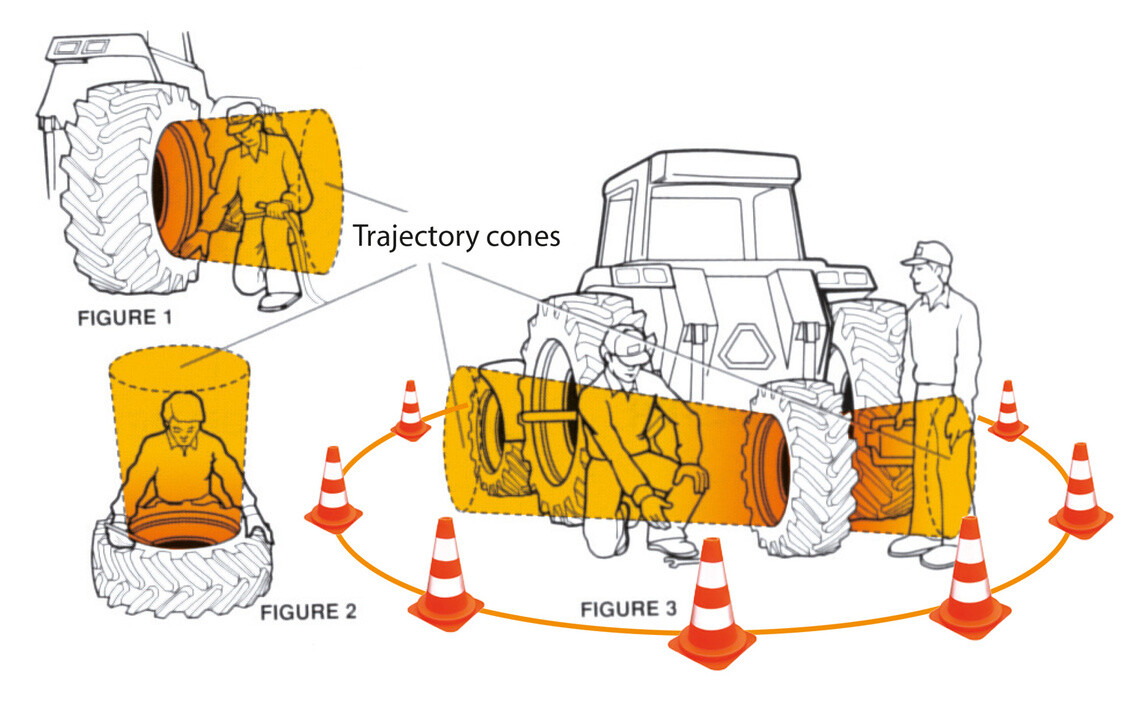
⚠️ IMPORTANT: Never stand within the trajectories cones (Figures 1, 2 and 3), to avoid any risk of physical injury in the event of an incident. For optimum safety conditions use a fully functional inflation gun connected to the valve by an air-hose extension of at least 3 meters, with a clip fitting to the valve and a calibrated pressure-gauge (never lock the trigger).
Safety:
Use the following safety equipment:
• System to support the tyre assembly (safety cage),
• Safety goggles
• Safety boots
• Ear defenders. If a safety cage or bar is not available, the operator should move as far away as possible from the tyre and rim.
Precautions:
Most importantly, check:
• When positioning the beads take particular care to ensure they are correctly located and centred in relation to the rim flanges and inflate to 2.5 bar (36psi), BUT NO MORE. To fit and position the beads to the rim seats INFLATE TO 2.5 BAR WITHOUT EXCEEDING THIS PRESSURE.
• If the beads are not correctly positioned: deflate, re-lubricate and inflate to 2.5 bar (36psi) repeat the operation as often as necessary until the beads are correctly positioned.

picto fitting 10 help and advice
Once all the preceding operations have been properly executed:
• Replace the valve’s inner mechanism (Valve core)
• Tighten the nut on the valve by hand
• Inflate to the determined service pressure, according to the load levels stated in the manufacturer’s documentation, or to storage pressure
• Tighten the valve cap after any inflation or pressure check, as this alone ensures that the valve remains clean and sealed.
If fitting the tyre horizontally on the ground (not recommended by MICHELIN because it is impossible to see if the lower bead is in place), take the following additional precautions:
• Initially, do not go above a maximum pressure of 0.7 bar (10psi) (to establish the seal)
• Lift the tyre-rim assembly, place it in a safety cage or position the upper part against a strong wall, never against a door or light partition wall
• Follow the inflation instructions for vertical fitting (figures 1, 2 and 3)
Note: All radial tyres to be used at low pressures must be fitted to high quality rims.
Beginning Operations
• When transporting machinery (by road, rail or ship), we recommend inflating agricultural tyres to 1.8 bar (26 psi) to avoid any damage due to certain stowage systems.
• When the machine is put into service, pressures must be determined and adjusted according to the load on the tyres and actual conditions of use.
Fitting and removal of an agricultural tyre (EN)
For at se videoen skal du acceptere visse cookies fra Youtube-platformen. Klik på knappen herunder for at åbne cookie-modulet.
Acceptér Youtube-cookiesOther help and advice pages that might interest you:
• Reading and understanding tyre markings
• How can you reduce soil compaction?
• Why and how should you ballast your tyres to get the most out of them?
• How do you find the right references for rims, tubes and valves?
• How do you store tyres safely?
• Road vehicle regulations


